OTTO Vision Technology: Proprietary image processing software a strength

Up to 30 electrical plug-in connectors per second, each of which entail any number of adjustable test features, and each error has to be detected with 100% assurance. Based in Jena, Germany, OTTO Vision Technology GmbH builds testing systems that meet such high-end demands. In doing so, it relies on machine vision cameras provided by SVS-VISTEK GmbH.
The name OTTO Vision Technology GmbH reflects the core competence of the Jena-based company which was established by the two brothers Gunter and Reinhard Otto in 1992 as an engineering office. They wanted to inspect electrical plug-in connector parts during the production process, using their own imaging software. Success came to them very quickly in this niche market. Very soon, however, they widened their range and sought to build fully integrated equipment.
“In 2000, we decided to specialize in testing equipment for connector parts and other small components in the punching industry. Among other things, our equipment is used by numerous component manufacturers to produce automotive wiring harness,” remembers Gunter Otto. “In the automotive industry, not even a single faulty part is allowed to enter production as this may lead to extremely expensive factory recalls.”
The demand for this kind of 100% quality control becomes even stronger considering the billions of connectors that are manufactured each year all over the world. Punching machines with speeds of up to 1,800 strokes a minute produce the connectors as punching strips which have to pass through the quality control systems. There, a wide range of geometric characteristics must be verified at a speed of up to 30 parts per second with typical tolerances of up to +/- 0.02 mm. Theoretically, a measurement precision of down to 1 µm is possible. To make matters more complicated, the connectors are highly reflective in unsuitable lighting conditions due to their metallic nature. This makes optical machine vision even more challenging.
“Such speeds combined with the need to detect each and every faulty part with 100% reliability are possible only with very powerful quality control systems where mechanical elements, high-end imaging systems and evaluation software are fully integrated and work in perfect harmony,” explains Gunter Otto. The systems made by his company meet these requirements excellently. The impressive customer list speaks for itself and includes names such as Delphi Connection Systems, Diehl Metal Applications, ERNI Elektroapparate, Inovan, Lear Corporation, Leopold Kostal, Patterer, Phoenix Feinbau, Scherdel Waldershof, Svoboda Stamping, TE Connectivity and Weidmüller Interface – as well as many others all around the world.
Flexible software crucial for success
“When we started building integrated testing equipment back in 2000, the tooling required for setting up new products was still very complicated,” Otto remembers. The two brothers concentrated on this aspect in the crisis year of 2009, shoring up their development department and coming up with an entirely new generation of software that focused on ergonomics and flexible configurability by the final customer. “Looking back, this proved to be a very wise step which continues to underpin our success,” explains Gunter Otto, describing the crucial decision made at that time.
Although OTTO Vision Technology’s main business activity is the production of integrated testing stations for punched strips, the powerful software makes a key contribution to its success. This is reflected in an installed base of more than 2,000 imaging systems all over the world. Eight software engineers are responsible for ongoing further development. “The entire imaging software including critical algorithms is developed solely in-house. We have now invested a good 30 person/years in the new-generation software,” says Otto, describing his company’s main focus. “Our primary strength is based on the software’s flexibility and ease of operation. Customers are able to set up new configurations themselves very quickly, and this gives them an advantage.”
This is paying off for customers: “Quite frequently we’re told that our systems can be set up far more quickly than those of our peers. This is a decisive financial factor in operations and, hence, an important argument in favor of our systems.”
With its focus on quality control, OTTO Vision Technology is also offering its proprietary software for use in imaging systems in completely different applications such as the furniture industry, circuit board production and in many other industries. The Linux world is used as a reliable platform for time-critical processes. The company is also flexible when it comes to the selection of software platforms for imaging: “If, for example, a customer wants to use certain Halcon tools as the software basis for its system, it is very simple for us to integrate these tools in the ‘OTTO world’.”

Third-generation testing stations
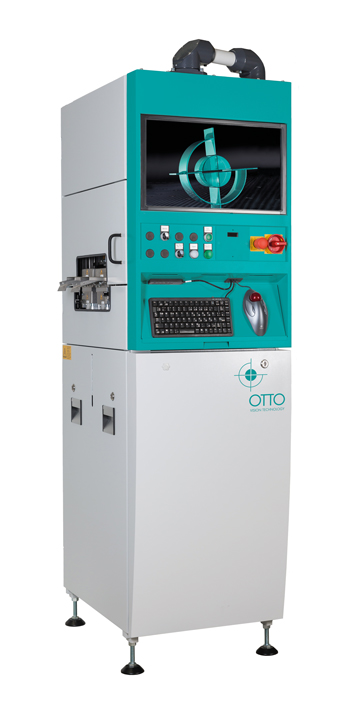
At the beginning of 2017, OTTO Vision Technology launched its third-generation PSS-40 testing stations for punched strips. Compared to their predecessors, they feature optimized operator access and improved mechanical modularity. These systems come in three different widths from 550 to 970 mm and may be fitted with dual-track technology allowing two punched strips with the same or different connector types to be inspected simultaneously.
The mechanical modules contain complete control units and facilitate swift replacement and reconfiguration. This characteristic is important for OTTO’s small and mid-size customers in particular: “In big production lines, some customers run a single connector type in very large quantities for several months without any reconfiguration. Smaller companies, by contrast, mostly handle smaller series so that retooling must be as quick as possible.”

These cameras don’t miss a single error
OTTO Vision Technology has been using camera technology supplied by SVS-Vistek in Seefeld, Bavaria, for its imaging stations since 2011. “During this period, we explored the market carefully to find a suitable partner for the transition to GigE technology. We were immediately impressed with what SVS-Vistek had to offer,” says Gunter Otto, who remains convinced that his company made the right decision at the time: “The range of SVS-Vistek cameras is a perfect fit for our tasks in terms of resolution, speeds and many other technical characteristics. At the same time, we discovered when we integrated GigE Vision cameras in our systems that a standard still leaves a lot of scope for the implementation of the details. When testing different camera manufacturers, this showed some surprising results. This becomes relevant when we operate the cameras at the limits of their specifications. SVS-Vistek sales and support, was able to help us significantly in implementing high- performance GigE Vision and Camera Link solutions in our test stations.”
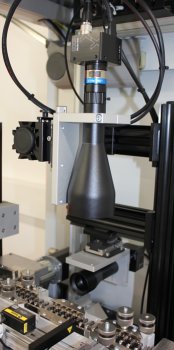
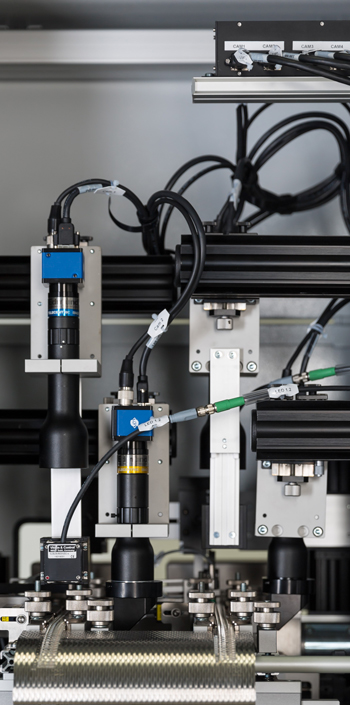
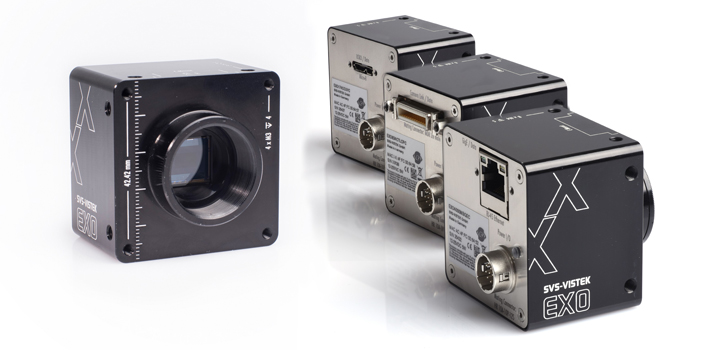
Depending on the model and the customer’s requirements, up to four SVS-Vistek EXO or EVO cameras with a resolution of 3, 5 or 8 megapixels are integrated in each testing station. According to Otto, the version with the highest resolution is used only in systems for testing larger items at a slower speed of around 20 items per second. With solid PC technology, image acquisition cards from Silicon Software or Euresys and suitable lenses, powerful imaging systems have been created meeting the challenging demands for punched strips inspection.
Apart from speed and resolution, Gunter Otto also mentions additional reasons for using EXO cameras: “These cameras feature an integrated four-channel flash controller providing up to 3 A of current which is used to control the lighting modules. The result is an economical, lean system design in terms of hardware and software. Time-critical tasks are benefitting from direct communication of the camera I/Os with the PLC.” The possibility of choosing between GigE Vision and Camera Link interface was one more reason for Gunter Otto to go with the EXO series cameras. A graduate in mathematics, he also likes the efficient driver design, which reduces the CPU load and makes high testing speeds possible in the first place.

Yet, it was not only the cameras but also SVS-Vistek as a company that impressed the Otto brothers: “SVS-Vistek is a German camera manufacturer and thus able to respond quickly to customers’ requirements with suitable modifications. That makes a difference.” A further advantage is the future-proof qualities: “quite often it is not easy to integrate new camera series in the equipment. However, with SVS-Vistek we have been able to perform such migrations across various models and series over the last few years very smoothly. A very consistent connector pin layout and libraries without interface modifications are helping in industrial design.”
3D measuring technology is the future
Gunter Otto is focusing on two future trends: Until now, CMOS and CCD cameras have frequently been used in his company’s equipment. However, he thinks that it is only a question of time before imaging is based solely on CMOS cameras. Secondly, he has great expectations regarding 3D measuring technology. “We are already working on integrating 3D functions in our PSS-40 systems and implementing full 3D probes. Currently, capturing 3D point clouds is still proving to be a bottle neck but technology never stands still and we’re making good progress. The future definitely belongs to 3D measuring technology,” Otto believes.
“Our software is already prepared for 3D measurement and we are already using it in hybrid form with 2D processes. I assume that our first systems with 3D probes will be rolled out in spring 2018.” At the same time, Gunter Otto is very confident that SVS-Vistek cameras will continue to be a key part of the next-generation systems for the comprehensive quality control of punched strips.
Further information:
OTTO Vision Technology GmbH manufactures optical measurement and testing systems based on industrial image processing systems and supplies customers in Europe, Asia and America with tailor-made products with a broad range of services for addressing complex testing tasks.
OTTO Vision Technology GmbH
Im Steinfeld 3
07751 Jena
Phone: +49 3641 67150
Fax: +49 3641 671515